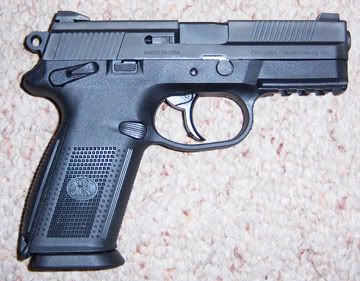
Months into open carry of my FNX 9 pistol I was unsuccessful in finding a “made for” holster for this handgun.
A simple modification has produced what is likely the best option for a push button retention holster available for this pistol.
After some research I found users happy with using the Springfield XD holsters, I took the chance and ordered the "Tactical Retention Paddle Holster” by Target Sports I also ordered the belt adaptor to replace the belt/pant paddle to keep this on my duty belt. Of course this is a copy of the BlackHawk SERPA holster but the price is 17 bucks at CDNN the least expensive source and you can’t beat that price.
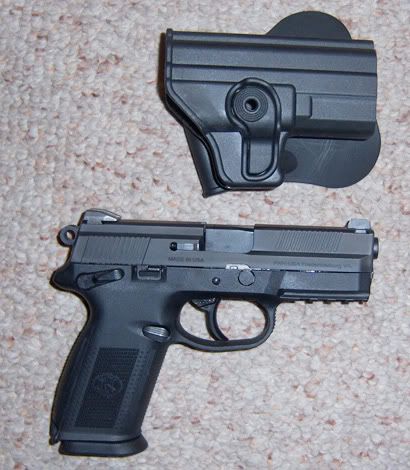
It did fit unmodified, but it was loose and wiggled in the holster. It was close but not exact, I started to look over the holster and first noted that the barrel cover at the end was 1.5 inches longer than needed (this would give me material for modifications later see first photo).
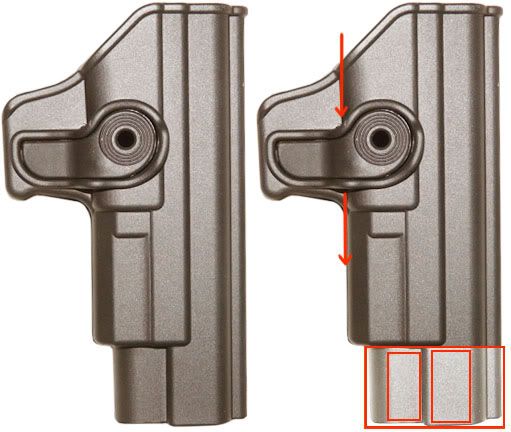
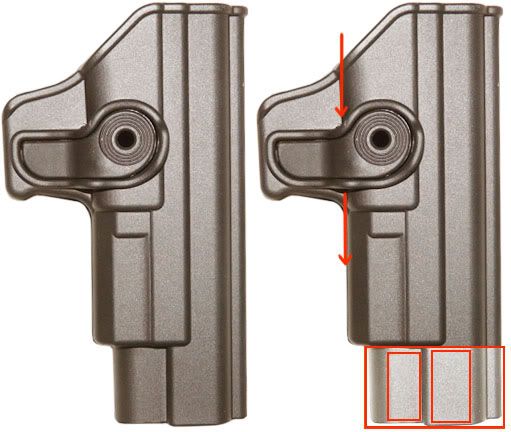
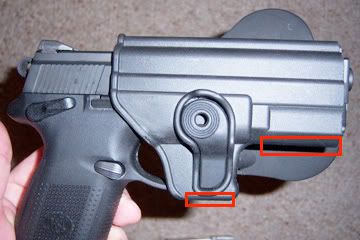
The first photo is the complete holster unmodified and the areas that will be cut off with a saw (I used my chop saw but a Miter Box and hand saw would keep it straight). If you do use a power saw, be sure to hold the product firmly with an extension (pliers) and bring the saw to full speed and go slow, the polymer can melt and grab the blade slinging the polymer holster into the next county.
The right side photo shows the main section that will be cut and four sections (both sides of the scrap piece) that will be trimmed from that discarded piece for space fillers. Make a straight cut across the holster as near or on top of the lower indentation as shown. The material that will be used to fill in extra space can be trimmed with a dremel disk, with a heavy set of Industrial scissors, or a set of tin snips.
The cut section has two rectangles drawn, the left hand smaller rectangle is the thinner material, this will be the section for the trigger guard, the right hand will be the sections (I used both sides glued next to each other inside the holster track).
The arrows are showing the entry and exit points of the pin for the push button release. This will be explained later.
Here is the holster with paddle over the pistol, the holster’s extra nose has been removed.

This photo shows the locations for the rectangle scrap parts cut from the nose will go, trim up the pieces so they fit and you will glue them into position with super glue (hold them in place for 250 seconds, super glue will work but takes time to set with this polymer (use disposable gloves to keep from glueing yourself to the holster). In the nose section shown on the right (this is where the two thicker sections are glued) one rectangle will need to be cut to fit.
Here is a front/nose/business end, photo of the pistol in the holster showing the close fit, the arrow shows the scrap of polymer from the cut section glued into position, this photo also shows the duty belt and optional belt loop. Note that you can clearly see the extractor and firing pin hole in the empty chamber.
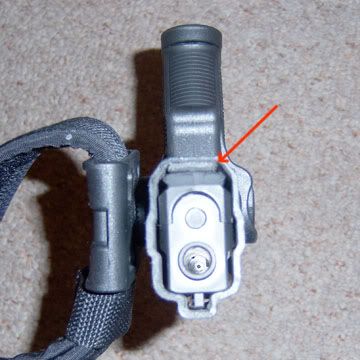
Now refer to the photo, the arrows show about where the pin that holds the button in is located, get a long thin punch or an ice pick and push out the pin while holding the button. There is a spring under the button that will cause it to jump across the room if you are not holding it. Once you remove the pin you will take a dremel tool abrasive disk or a file and modify the internal block/hook for the trigger so that the pistol will be locked into position.

Here is a photo series showing the inside block/hook and how it will be modified.
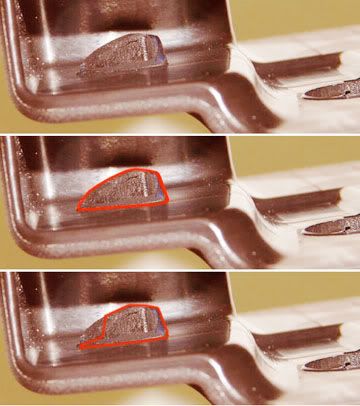
The top photo shows the block/hook as it would extend into the trigger guard. The middle photograph shows the block/hook highlighted. The bottom photo shows the aproximate material that will have to be removed to let the new trigger guard snap into place.
You may have to repeat your trigger block modifications and re-assemble to fit, try and take off only as much material as is needed to lock the gun into the holster.
That is all there is to this modification and it works great, and you cannot beat the price.
No comments:
Post a Comment